Customer Reviews With Photos
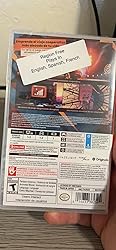
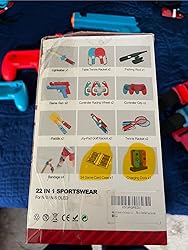
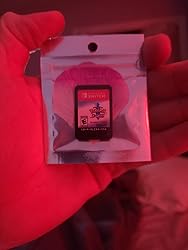
The product box is in SPANISH! No where in the description does it mention the box will be in Spanish. I wouldn’t normally care, but I’m gifting it to someone. So they’re going to open it and be very confused and/or think I’m a cheapo for buying a Spanish packaged present. The sticker mentions that the gameplay is in English, but that’s still besides the fact that the packaging is in Spanish and that’s the first thing the receiver will see. I am embarrassed to gift this to them and it’s too late to order a new one before Christmas. Definitely not buying from A2Z games again. Not reliable.
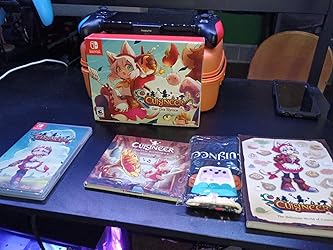
I played this for a bit on PC (on Steam) and thought it was cute and fun enough to get on my new Switch OLED. Also because I will end up playing it more since it is very fun on a handheld device.
😁

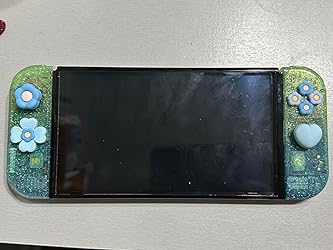
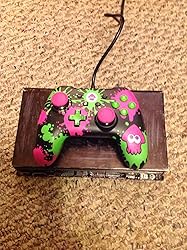
Obsessed with how this turned out. This is a pretty simple project if you follow the tutorial on youtube from the company. I opted not to do the bottom section where the charger is, as it requires full disassembly of all the guts and I didn’t trust myself not to break the super delicate screen connector. It still looks great. The hardest part for me was dealing with the tiny springs under the shoulder buttons in the joycons because I have long nails. Otherwise, it’s just unscrewing stuff and then screwing stuff back in in the reverse order. I’d recommend also purchasing a computer repair kit that comes with tweezers, a magnetic screw mat, and a stick-shaped pry tool, as those are not included in the kit but are very useful. The screwdrivers provided, while functional, are also not the highest quality and will probably strip a screw if you have any that are screwed in unusually tight. Make sure you’re working on a soft surface like a towel or mousepad so you don’t scratch your screen. Set aside a couple hours (it took me around 4 with lots of breaks) and take your time. It’s fun as long as you have the patience and dexterity to deal with a hundred itty bitty screws, and so worth it for how beautiful it looks when you’re done :)
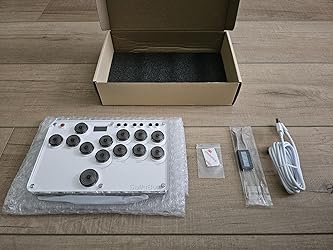
I can't believe you can get such amazing controller for this asking price! When I was younger, most third-party arcade sticks and peripherals were complete garbage. It took years until Street Fighter IV ignited the market for more premium fight sticks. Now the scene has quite literally exploded with quality offerings from big manufacturers to smaller boutique outlets. You could even go the DIY route and build one yourself these days! "Leverless" controllers are a newer development as far as arcade sticks go, and the technology in them tends to overlap with what you'd find in many mechanical keyboards. Like my Snack Box Micro, this Sallybox controller has a hot swap PCB that lets you customize and replace your main switches with any Cherry MX-compatible variant. But, unlike the Micro, these are full size keyboard switches, so you have an INCREDIBLE degree of choice in how you'd like to customize your button presses. You could pick lighter switches, heavier switches, tactile switches, clicky switches, silent switches, you name it. The dimensions of this controller are 19.5cm by 12.3cm with a thickness of around 2cm. I've compared it to the Snack Box Micro in some photos. It's quite compact, but it's also heavier than the Micro by over 100 grams. The matte button caps are 20mm, with the bottom "Up" button being a larger 24mm. Some players may prefer wider buttons, a layout with more space, extra area to rest their palms, or a larger surface to stabilize on their laps. This probably won't be a good option for them considering how compact it is. I was most surprised by how much quieter the Sallybox is compared to my Snack Box Micro--it's a SOLID hunk of plastic, so that must help dampen the sound quite a bit. Looking at the switches, they also resemble Silent Reds. If you see this listing and think it looks similar to a Haute42, you wouldn't be too far off. They both run on custom GP2040-CE firmware. Because of that, they're all incredibly responsive and have a similar suite of capabilities when it comes to things like customization and RGB. The product page tells you most of what you need to know to get started, but you'll be able to find plenty of additional information online if you know where to look. The controller comes preset with SOCD Neutral and I believe the latest Sallybox firmware. At the time of review, there's actually a newer GP2040-CE firmware available, but it hasn't yet been updated on the Fighting Box website. Should you need to change the firmware, it's one of the breeziest firmware updating processes I've ever experienced. I have a couple minor complaints, mostly the USB-C port being on the left side which I find a little awkward. The bottom of the controller has a "BOOT" switch somewhat exposed, so you're gonna want to use the included sticky silicone feet if you're planning to play on a hard surface. (They won't stay on the screws, so put them next to the screws.) The firmware also doesn't light up the top "Up" button once it's pressed--instead, it will illuminate the bigger "Up" button below. It's a minor annoyance, one that might be addressable with a different firmware build, but something to note regardless. The only major snag I ran into was a Windows 11 issue. I couldn't get the default PC/XInput mode to recognize on my computer. Because XInput sets this Sallybox to show up as an Xbox 360 controller, Windows needed a manual installation of old Windows Xbox 360 drivers ("Xbox 360 accessories 1.2"). I can't put links in a review, so hopefully that points you in the correct direction if you run into the same problem. Before I fixed the issue, I had the Sallybox set to "PS4" mode which worked fine with Steam Input. Lastly, you can replace the artwork inside if you unscrew the board after removing all the buttons/switches. Places like Focus Attack don't appear to have dedicated Sallybox templates available for their custom artwork service, but I'm sure you'll eventually be able to find what you need--the internet is a wonderful place! Between you and me, it kinda gives my Snack Box Micro a run for its money. Not only is it smaller, more pleasing to press, and noticeably quieter to operate, the second "Up" button in WASD format is a welcome addition will make playing certain games like shmups on leverless a little more intuitive.
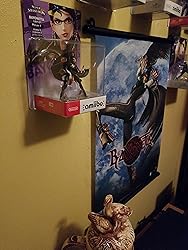
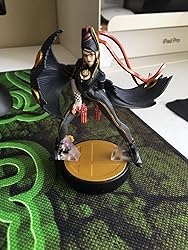
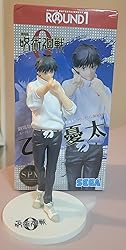
Great figure. Best Amiibo you can find
Really Nice
Arrived in dented and taped box - to cover damage. Two items missing: charging dock & game card case
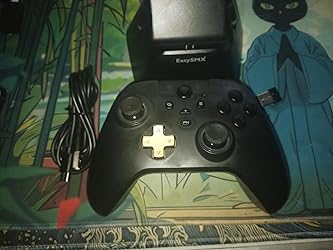
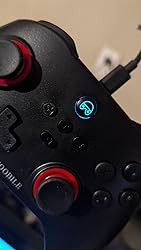
I have many controllers and i have 2 other controllers from easysmx and loved them but when i saw this one with a charging dock which i always love when controllers and other devices have a dock with them i wanted to give this controller a try. When i received it i really loved the dark see through design and the gold dpad and triggers gives it a retro look and when powered on first thing i notice is the rgb is pretty bright which i do like but you can also turn it off or lower the brightness with the FN button and dpad which you do the same with the color modes and vibration so it's pretty simple and i do like that. It also feels great in the hand and has a nice texture feel and does not feel cheap and has a good weight to it and all the face buttons while they not mechanical as some of my other controllers they still feel good and still have tactile feel to them, And the triggers feels great and nice and smooth and i like that you can change them to a rapid trigger input if you want to than the analog sticks which is hall effect of course they going to feel great. Than on my controllers i always love when they have the 2 back buttons cause i use them to shift gears in racing games and it's so easy to program with the FN button. Battery life is great so far which i haven't even drained it yet but that's because when I'm done with it i always put it back on the dock and that's what really caught my eyes when i saw this controller is the dock it's so much better to have and i always remember to put it on the dock when I'm done with vs plugging in a wire as i forget to do with my other controllers and i also like that you can plug the dongle right into the back of the dock so it cant get misplaced and it uses ony one usb port on your computer instead of 2. Really i could not find any cons with it and ony thing i would say if i had to say about one if it was a problem with me would be the dpad it could be better but i hardy use the dpad cause i ony use flight sticks when I'm playing fighting games and i mostly ony use controllers with racing games and this controller is great with those so really not a issue for me and everything else in my opinion makes up for it so it does get a thumbs up from me i like it👍
Very great! I love the design! The delivery was perfect.
A complete breakdown of how to play the game, game layout, game diagram, gaming abilities, player & enemie(s), ect. is broken down in an inclusive menu option that will leave the player well learned and wanting to play each game, also online ranking for some games. The games are nostalgic and ironically challenging but not unbeatable. Even a newcomer to gaming can learn and appreciate what a detriment these classic are in gaming history.
I love that it's wireless, but when I'm really into a long play game session, I still have the wired option. It's ready to plug & play with presets but the joy that it's programmable is something to talk about. It stores multiple combos, macro. I like this controller's classic feel, nice & steady. It's really good with my PC. Its working great with my Switch too as an extra full-sized controller.
The figure looks great and matches the size of my other figures...some of the banpresto figures are a little small and I wanted the figure to match my other ones.
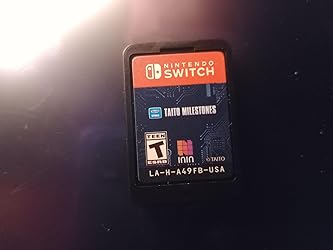
Definitely worth it. Delivered quickly, faster than advertised. Also shipped and packaged in reasonable plastic amount. Games are normally packaged in huge containers for no reason. Games aren't like they use to be, they aren't on discs or have instructions. Games are gonna play or not, it's better to get a used game today than new.
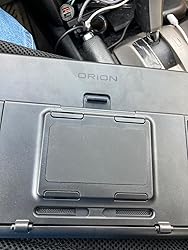
When attaching the grips: you need to press down, and apply pressure sliding them toward the base of the unit to get the screw holes to line up properly. Insert power cord into the Orion screen. (Connected to either a charged power bank, or wall cord). Press the power button, and ensure the blue light comes on. Turn on your Nintendo Switch before inserting into the Orion screen. if you don’t get it inserted into the Orion screen fast enough: the Nintendo Switch will go to sleep, and the Orion screen will display “No signal”. The Orion screen logo will appear after a few seconds. Then the screen will go black. Then it takes another 5-10 seconds for the Nintendo Switch screen to appear. Sometimes it takes several more seconds for the Joycons to begin working. The right one will connect first, and after a few more seconds the left one will be connected After that you can enjoy playing normally. I love mine; and since all my games are digital copies I leave it in the Orion screen all the time. Just need to open it enough to press the power button on the Nintendo Switch if it has been off/asleep for an extended period of time. The box comes with 4 little pieces of plastic you can snap in where the velcro straps go if you aren’t going to use them to strap in a power bank. (Don’t think the instructions mention what they are for). The picture I submitted for this review is what it looks like with the straps removed and the plastic covers inserted. Happy gaming! Edit: After playing daily for a month I like it even more. I’ve realized since I always use sleep mode: I only need to press the home button, and power on the Orion to begin playing again (never need to take my Switch out of the screen). Also, I noticed the similar 10.1” screens sold on akiya-switch.com have a big border at the top/bottom, and I love how the games fill the whole screen on this one.